

Well, it’s two weeks before Thanksgiving but I’m ready to get some Christmas presents started! I go and visit my family over Thanksgiving so instead of mailing their gifts I like to bring them up the month before hand. Yesterday I worked on whipped lavender body cream, honey mint lip balm, grounding body oil, and these amazing beeswax reusable food wraps! I felt pretty productive considering I was making all of these things with an almost 2 year old around.
I want to talk a little more about these beeswax food wraps. These were so much easier to make than I expected! I am trying to phase out all of the Disposable plastic in my life, and Saran Wrap was one thing I thought could easily go. I’m going to give these as Christmas gifts, but I also made enough to keep for myself and different sizes.
Interested? Here are the steps that I followed.
Step 1: first you’ll need some light cotton. I had some extra king size pillow cases that were not being used, so I cut those into four 8 x 8 and four 12 x 12 pieces. I used sewing scissors to cut the pillowcase, but they still frayed a bit on the edges. Wash and dry the fabric to get all the little frayed edges of the fabric off.
Step 2: Set out beeswax pellets (I got mine from a local Berry Farm, Tubbs, but you can buy yours online if they’re not available locally), jojoba oil or sweet almond oil, an ironing board and warm iron, the cleaned and dried cut cotton, and two large pieces of parchment paper. You also want to set up a place to hang dry the food wrap as the wax sets. I used two chip clips and clip them on to the window blinds next to where I was working. You could do something much more formal!
Step 3: Assemble a large piece of parchment paper on top of the ironing board, then lay a piece of fabric down, then sprinkle beeswax pellets or grated beeswax and a few drops of oil over the cotton fabric. Next, put the second piece of parchment paper on top of the beeswax covered cotton, and put the iron on top of the parchment, melting the beeswax. Spread the iron around to evenly distribute the wax. Then, peel the top parchment away, pick up the slightly sticky beeswax covered cotton, and clip it somewhere to hang dry. It will dry within a minute.
Step 4: After the beeswax has dried, you can roll up the reusable food wrap and store. To use, layout food wrap over bull top and run fingers around the edges of the bowl to warm the wax and help its Stick Over the surface. You can also wrap food in the beeswax pieces to keep it from drying out.
Step 5: Thank those bees!
The next time I do this, I’m going to get some cute cotton. Maybe use sheets? Or just fabric from the local store? I’m not sure. You can also sew on buttons to make bags!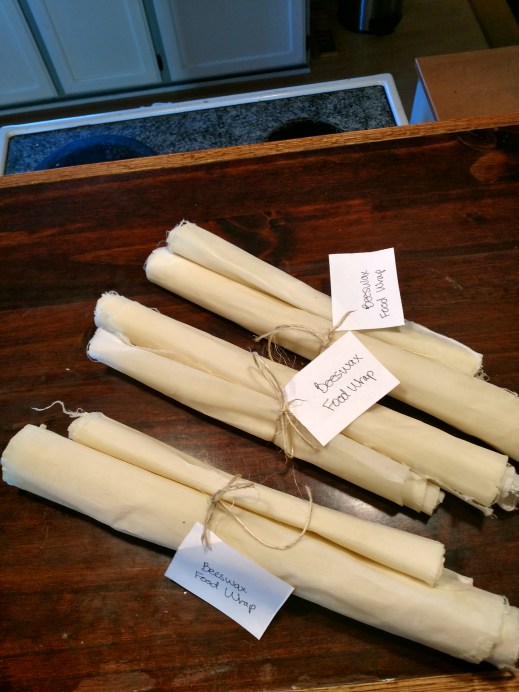


One thought on “DIY Beeswax Food Wrap”